There's a moment every Reception teacher knows well. It's somewhere around the third week of term. You've introduced the letter 'a' carefully — demonstrated it on the board, talked through the starting point, done the sky-writing together. And then you look around the room and see twenty-two different versions of 'a', roughly half of which are formed from the bottom up, and one of which bears a closer resemblance to a potato than a letter.
If you've been there, this guide is for you. And if you're a parent helping a Reception or Year 1 child at home and wondering whether you're reinforcing the right habits or accidentally making things harder, this is for you too.
Teaching handwriting well at this age matters more than it might seem. The habits formed in Reception — how a child holds their pencil, which direction they start a letter, how they sit — get reinforced thousands of times over the next decade. Getting them right early is dramatically easier than correcting them at age nine, ten, or twelve. Ask any Year 5 teacher about trying to fix a child's pencil grip and you'll understand exactly what I mean.
This guide is long, thorough, and built around what actually works in real classrooms — not just what sounds good in a curriculum document.
- Before the Pencil Touches Paper — Pre-Writing Skills That Matter
- Teaching the Correct Pencil Grip From Day One
- Seating, Posture, and Paper Position — The Overlooked Foundations
- Letter Formation Order — Why Alphabetical is Wrong
- Multi-Sensory Techniques That Actually Stick
- The Most Common Letter Formation Mistakes (and How to Fix Them)
- Building a Daily Handwriting Routine
- Handwriting Schemes — What Works and What to Watch Out For
- A Note for Parents Helping at Home
- What to Expect — Reception to Year 1 Milestones
- Frequently Asked Questions
Before the Pencil Touches Paper — Pre-Writing Skills That Matter
I want to start with something most handwriting guides skip entirely: the physical readiness that has to exist before formal letter formation can begin. This is especially relevant for parents who want to get a head start and for teachers working with Reception children who enter with very different levels of fine motor development.
Writing by hand is, at its core, a physical skill that requires meaningful hand strength, finger isolation, wrist flexibility, and bilateral coordination (using both hands together). A child who hasn't developed these foundations will struggle with pencil grip, letter formation, and pencil pressure — not because they aren't trying hard enough, but because their hands genuinely aren't ready yet.
Pre-Writing Activities That Build Real Readiness
Before introducing formal letter formation, check that a child can: hold a pencil without their knuckles going white, draw a circle starting from the top, draw a cross (vertical then horizontal, not one continuous stroke), and copy a simple zigzag line. If any of these are very difficult, more pre-writing work will pay off far more than pushing forward with letter practice.
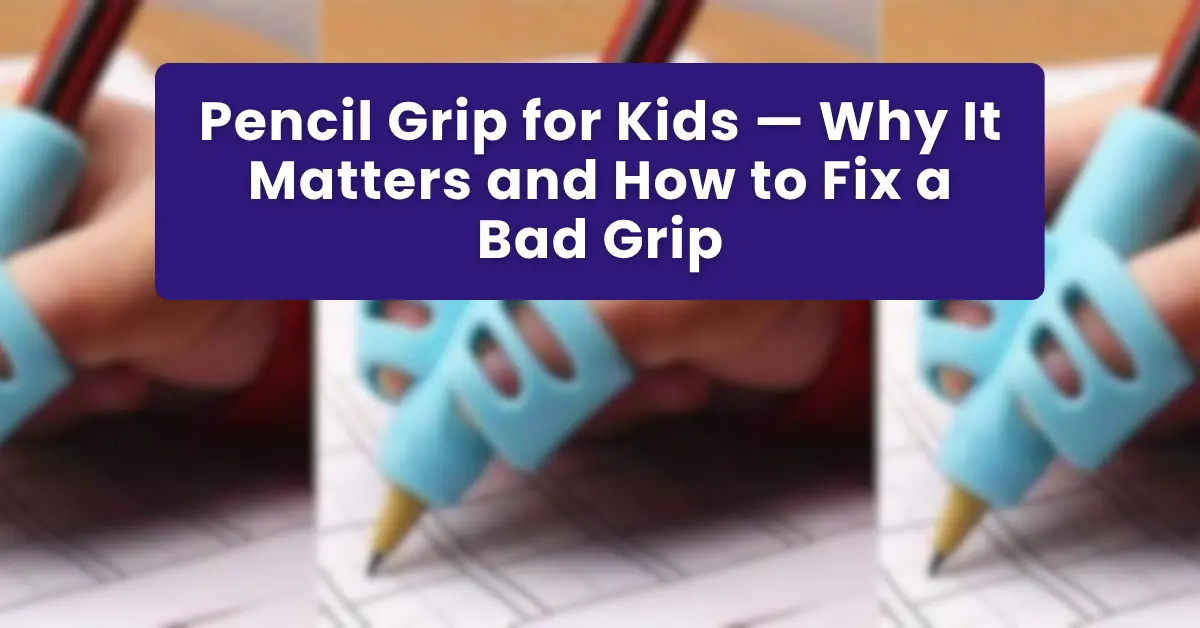
Teaching the Correct Pencil Grip From Day One
If I had to give one single piece of advice to every Reception teacher and parent, it would be this: establish the correct pencil grip from the very first session, before any other aspect of handwriting is taught. Correcting grip after it's been reinforced through months of writing is one of the most frustrating challenges in early years education — and entirely avoidable if it's addressed from the start.
The Tripod Grip — What It Is and How to Teach It
The tripod grip: the pencil rests in the hollow between the thumb and index finger, held in place by the tips of the thumb and index finger, supported underneath by the side of the middle finger. The pencil sits at roughly a 45-degree angle, pointing back toward the shoulder. The ring and little finger curl loosely under the hand.
To teach it to young children, there are three approaches that work in practice. First, the "pinch and flip": place the pencil flat on the table with the tip pointing away from the child. Ask them to "pinch" it at the writing end with their thumb and index finger, then "flip" it up so it rests back toward the shoulder. This naturally produces a good tripod grip without any complicated instructions. Second, the "pencil friend": put a small sticker or draw a tiny face on the side of the pencil where the thumb and index finger should be, and tell the child their thumb and finger need to "hold the friend." Third: short pencils. Children grip short pencils correctly almost automatically because there isn't enough room for the extra fingers. Break standard pencils in half and give young writers the shorter piece.
The tripod grip: the three-point hold that prevents hand fatigue, allows for precision, and sets up everything that follows.
What About Children Who Use a Different Grip?
Not every child will use a perfect tripod grip, and that's okay. Two alternative grips that are generally acceptable are the lateral tripod (where the pencil rests on the index finger rather than between thumb and index) and the quadrupod (using four fingers instead of three). Both can produce fluent, legible handwriting.
The grips that do cause problems — and warrant gentle correction — are: the fist grip (whole fist around the pencil, producing excessive pressure and fatigue), the thumb-wrap grip (where the thumb wraps over the other fingers, limiting movement), and any grip where the child's hand goes visibly tense and white. In all of these cases, a grip aid or triangular pencil is worth trying before making correction a repeated talking point.
For a much more detailed exploration of grip problems and fixes, have a read of our guide on pencil grip for kids — it goes into far more detail than we have room for here.
Correcting a child's grip while they are mid-sentence breaks their concentration and creates anxiety around writing. Instead, build a 2-minute grip warm-up into the start of every handwriting session — pencil games, grip checks, physical positioning — and then leave them alone to write. The start of the session is for the grip; the session itself is for the writing.
Seating, Posture, and Paper Position — The Overlooked Foundations
Here's something that rarely makes it into handwriting discussions but matters enormously in practice: the physical setup of a writing child determines a very large amount about the quality of what they produce. A child writing at a desk that's too high, on a chair that's too low, with paper at the wrong angle, is fighting their body on top of trying to form letters correctly. Remove those obstacles and you'll often see immediate improvement with no other change.
One Reception teacher I observed had a "Ready to Write" routine that took less than 30 seconds and transformed the physical setup of her sessions. She'd say: "Feet flat — check. Sitting tall — check. Paper tilted — check. Non-writing hand on the paper — check. Pencil friend ready — check." The children knew the sequence by heart by week three, and she rarely needed to interrupt sessions to fix physical problems because they'd been addressed before writing began.
Letter Formation Order — Why Alphabetical is Wrong
Teaching letters in alphabetical order — A, B, C, D — is one of the most persistent and harmful habits in early handwriting instruction. It seems logical, and it matches how children learn the alphabet in song. But from a motor learning perspective, it's the worst possible approach, and here's why.
Letters share stroke patterns. Every letter in the alphabet is built from a small number of core movements: anti-clockwise curves (as in c, a, d, g), straight downstrokes (as in l, i, t), humps (as in n, m, h), and diagonal lines (as in v, w, k). If you teach letters in formation groups — grouping together all the letters that share the same starting stroke and movement pattern — children learn each stroke once and then apply it across multiple letters. That's efficient, fast, and durable.
By contrast, teaching alphabetically means moving from A (diagonal strokes) to B (straight line plus curves) to C (anti-clockwise curve) to D (straight line plus curve) — four completely different movement patterns in the first four letters. Children never build up a bank of reliable strokes. Every letter is a new problem to solve.
The Four Formation Groups — Teach in This Order
Some teachers worry that teaching letters in formation order conflicts with phonics. In practice, the two work alongside each other: phonics decides which sounds to introduce and when, while formation groups decide in which order to introduce the physical writing of those letters. Most phonics schemes begin with s, a, t, i, p, n — and all of these appear in Groups 1, 2, or 3, which means the overlap is very manageable with a bit of coordination.
Multi-Sensory Techniques That Actually Stick
The research on early motor learning is fairly consistent on this point: new physical skills are encoded faster and retained longer when they're reinforced through multiple sensory channels. For children aged 4–6, this is even more pronounced. A child who has traced a letter in sand, written it on a whiteboard, formed it in playdough, and sky-written it with their whole arm before writing it on paper will form it more accurately and remember it better than a child who has only practised on paper.
This isn't about making things fun, though that's a genuine benefit. It's about how motor memory consolidates in the young brain. Multiple modalities create stronger, more resilient neural representations. That's why multi-sensory handwriting practice isn't a nice extra — it's actually the most efficient route to automaticity for this age group.
10 Multi-Sensory Techniques for KS1 Handwriting
For more ideas on engaging handwriting activities that work in a classroom setting, our guide to handwriting practice games for primary school children has over 20 ideas that you can drop straight into your lessons.
The Most Common Letter Formation Mistakes (and How to Fix Them)
Every Reception teacher has a mental list of the letters their class struggles with most. Some of these problems are universal — they appear in classrooms across the country every year — and understanding why they happen makes it much easier to address them effectively rather than just asking a child to try again.
The most common problem in early writing, and the one that worries parents most. It's important to know that reversals are entirely normal up to age 7 and are not an indicator of dyslexia on their own. The brain hasn't yet established the strong left-right directional orientation that comes later. For b/d specifically: a lasting visual anchor is to ask the child to write the word "bed" — the b is the headboard on the left, the d is the footboard on the right, and the e is the mattress in between. Once they can picture the bed, b/d reversals decrease dramatically. Do not drill both letters simultaneously — introduce them weeks apart to avoid the comparison that causes confusion.
Many young children, particularly those who haven't had explicit formation instruction, form letters by starting wherever feels natural — which is often the bottom. This produces letters that look correct but are formed incorrectly, creating habits that slow down handwriting and make joining letters (in Year 2 and 3) significantly harder. The fix is consistent verbal and gestural cueing at the point of writing: "Where do we start? At the top." Physical cues help: put a small dot or sticker at the starting point so children have a visible target. And the sky-writing exercise helps, because the whole-arm version of a downstroke makes "starting at the top" feel natural in a way that a small pencil movement doesn't always make clear.
Children often mix letters of wildly different heights: enormous 'o's next to tiny 'a's, tall 't's that are the same height as short letters. This is almost entirely a paper issue at this stage: they don't have a visual reference for how tall each letter should be relative to the others. The solution is dotted thirds paper, which visually shows three zones — ascenders (tall letters like h, l, b), middle zone letters (a, e, o, m), and descenders (g, y, p). Spend dedicated time explaining and showing which letters sit in which zone before asking children to use it, rather than introducing the paper and assuming they'll understand the zones intuitively.
One of the most frequently mis-formed letters in Reception. Many children produce an 'a' that looks more like a 'u' with a line on the side — the anti-clockwise curve never fully closes. The root cause is usually that they're writing too quickly for their current level of fine motor control, and the closing stroke gets left off. Slow it down, work on it in isolation, and use the oval drill from the stroke exercises to build the muscle memory for fully-closed curves before returning to the letter itself.
Some children grip and press as though they're trying to engrave their letters into the desk. This produces letters that are indented through to the next page, leads that break constantly, and hands that ache after three sentences. The underlying cause is usually tension in the grip. Gentle cue: "Are you squeezing your pencil friend? Let them breathe." Using a gel bag or shaving foam (which reward light pressure) alongside paper writing helps recalibrate. In persistent cases, an occupational therapy referral is appropriate — excessive pressure can sometimes indicate a sensory processing difference that OT can address directly.
Letters like 'a', 'e', 'g', 'd' are single-stroke letters that some children write in multiple separate strokes — drawing an oval first and then adding the downstroke separately, for example. This produces letters that look correct but are written inefficiently, and will cause significant problems when joins are introduced. The fix is to explicitly narrate and demonstrate the single continuous movement: "Watch my pencil — it doesn't lift off until the letter is finished." Video of the letter being written in one stroke (slowed down, projected on the board) is surprisingly effective for children who are visual learners.
Building a Daily Handwriting Routine
One of the most powerful things any teacher or parent can do for a child's handwriting development is establish a consistent daily routine. Ten minutes every day beats an hour once a week — not slightly, but dramatically. The motor memory that produces fluent handwriting is built through distributed repetition, not massed practice.
Here's a practical daily structure that works across Reception and Year 1, adaptable to whatever time you have available:
For Reception children especially, two five-minute handwriting sessions per day (one morning, one afternoon) will produce better results than one ten-minute session. Young children's fine motor muscles fatigue relatively quickly, and quality drops sharply in the second half of a sustained session. Two short sessions let the muscles recover and mean children are always practising at their best rather than practising through fatigue.
Handwriting Schemes — What Works and What to Watch Out For
The UK primary handwriting scheme market has grown considerably in recent years, and most schools use some version of a structured scheme rather than creating their own resources from scratch. That's generally a good thing — schemes provide consistency, progression, and resources that save teachers significant time. But not all schemes are equal, and even good schemes can be used badly.
| Scheme | Style | Best For | Notable Feature |
|---|---|---|---|
| Letterjoin | Pre-cursive to cursive | Schools wanting digital integration | Browser-based animations showing formation; strong for interactive whiteboards |
| Twinkl Handwriting | Print to pre-cursive | Flexible classroom use; home learning | Vast resource library; free basic tier available; easy to adapt |
| Nelson Handwriting | Print with exit strokes | Whole-school consistency across KS1–KS2 | Long-established; clear progression; recognised by Ofsted inspectors |
| Read Write Inc. | Print integrated with phonics | Schools using RWI phonics throughout | Letter formation taught alongside phonics sounds — strong coherence |
| Kinetic Letters | Movement-based cursive-ready | Schools with OT support; inclusion focus | Strong body-movement foundation; particularly good for children with coordination difficulties |
The most important factor — more important than which scheme you choose — is whole-school consistency. A child who learns letter formation one way in Reception and a different way in Year 1 doesn't get twice the benefit. They get confusion, and the two competing patterns fight each other for the rest of primary school. Whatever your school uses, make sure every teacher in KS1 (and ideally all the way through KS2) is using the same formation style.
One of the most common causes of confused letter formation in Year 1 is parents practising handwriting at home using a different style to the school scheme. A child who learns a pre-cursive 'a' at school and a simple print 'a' at home is likely to produce an inconsistent mix of both. Schools should send home a copy of their handwriting scheme's letter formation guide at the start of Reception and actively encourage parents to use it. If you're a parent unsure which style your school uses, just ask — any good school will provide the information.
A Note for Parents Helping at Home
If your child is in Reception or Year 1 and you want to support their handwriting at home, the most important thing I can tell you is this: match what school is doing, not what you remember from your own schooling. Handwriting styles, letter formations, and even the order in which letters are taught have changed significantly since most of today's parents were in primary school. Practising the "wrong" style at home can genuinely make things harder, even when done with the best intentions.
The second thing: keep it short and keep it positive. Five minutes of cheerful practice is worth three times as much as fifteen minutes of tense, reluctant practice. Children who associate handwriting with frustration and correction will avoid it — and avoidance is exactly what you're trying to prevent. If a session is going badly, stop. Come back to it later or tomorrow. The habit is more important than any individual session.
For a comprehensive guide to supporting handwriting practice in a way that's stress-free and genuinely effective, we've put together a detailed resource specifically for families: how to teach handwriting to kids in a fun and stress-free way. It covers home practice from a parent's perspective in much more depth.
What to Expect — Reception to Year 1 Milestones
One of the most anxiety-provoking aspects of early handwriting — for both teachers and parents — is not knowing whether a child is progressing at the right rate. Here is a realistic, honest progression guide. Every child develops at a different pace, and a child who is "behind" on this timeline at one point may catch up rapidly at another.
Early
Can make meaningful marks and distinguish between drawing and writing. Holds a pencil with some consistency though grip may be immature. Copies simple horizontal and vertical strokes. Begins to form some letters — usually those in their name — with increasing consistency.
Late
Forms most letters with recognisable shapes, though size and direction may be inconsistent. Writes their first name independently in most cases. Some reversals are present and normal. Grip is closer to tripod. Can copy simple CVC words with support.
Start
National Curriculum expects children to begin forming lower-case letters in the correct direction, beginning and ending in the right place. Most children can write simple common words independently. Letter size is still variable. Reversals begin to decrease for most letters except the most common ones (b/d).
End
By the end of Year 1, the National Curriculum expects children to form all lower-case letters correctly and begin to form capital letters. Most children can write simple sentences with spacing between words. Baseline adherence is generally consistent. Some children begin forming exit strokes in preparation for joining in Year 2.
Ready
All letters formed correctly and with reasonable consistency. Size proportionate. Ready to begin letter joins as introduced in Year 2. Can write sustained sentences independently. Writing is legible to readers other than the child and their teacher.
For a detailed breakdown of what the National Curriculum expects at each KS1 stage, our article on KS1 handwriting expectations covers the statutory requirements clearly for both teachers and parents.
Most handwriting difficulties in KS1 resolve with consistent, quality teaching and practice. However, some children may benefit from additional support: those whose grip causes persistent pain or fatigue, children whose handwriting hasn't improved measurably after a sustained period of targeted practice, children who avoid writing tasks consistently (which can signal anxiety as much as difficulty), and children where handwriting difficulties are part of a wider pattern of coordination or motor challenges. In these cases, referral to an occupational therapist through school or GP is a well-evidenced and effective route. For children with dyslexia, our dedicated guide on helping a child with dyslexia improve their handwriting covers the specific adjustments that make a difference.
✅ Key Takeaways — Teaching Handwriting in Reception and Year 1
- Pre-writing physical skills matter enormously — playdough, threading, and large-scale mark-making build the foundations that formal letter practice depends on.
- Establish the correct pencil grip from the very first session, using short pencils, grip aids, and the pinch-and-flip technique. Correction after the fact is much harder.
- Teach letters in formation groups, not alphabetical order. The c-family first: c, a, d, g, o, q, e, s, f.
- Multi-sensory reinforcement — sand, whiteboard, playdough, sky-writing — encodes motor memory faster and more durably than paper practice alone at this age.
- Session length matters: 5–10 minutes for Reception, 10–15 for Year 1. Two short daily sessions outperform one long one.
- Reversals (b/d, p/q) are normal up to age 7 and do not diagnose dyslexia on their own. Address them with visual anchors, not anxiety.
- Whole-school consistency in handwriting style is more important than which scheme you choose. School and home practice must match.
✍️ Try Structured Handwriting Practice on Handwriting Repeater →